• About
  • Reel
    • Respawn
    • Relic Entertainment
    • Sony Santa Monica
    • EA Tiburon
    • FIEA
  • Side Projects
  • Contact
  • Stickless
Menu

Aaron Cendan

Technical Audio Designer
  • About
  • Reel
  • Experience
    • Respawn
    • Relic Entertainment
    • Sony Santa Monica
    • EA Tiburon
    • FIEA
  • Side Projects
  • Contact
  • Stickless
×
1+-+NQk6hAn.jpg

Custom Reaper MIDI Controller

Guest User October 14, 2019

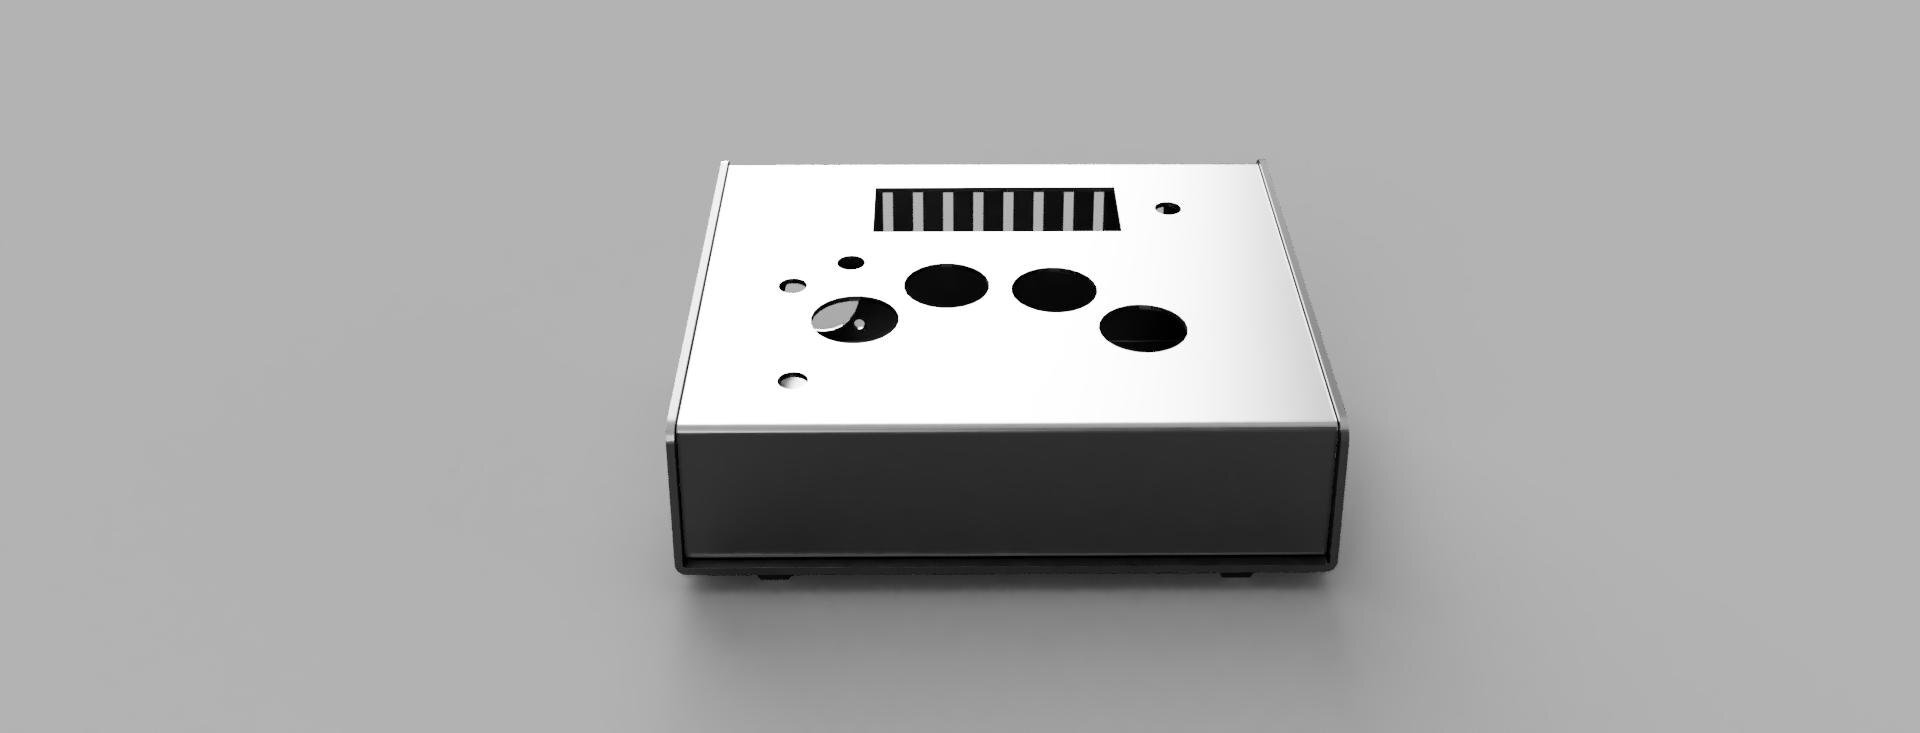
After a few years of building controllers for video games (Stickless), I felt like it was time to tackle a new challenge: building an Arduino based MIDI controller to quickly access common functions in my audio workstation (DAW) of choice, Reaper. If you are interested in building one yourself, feel free to reach out and I will gladly help adapt the CAD model and/or software to fit your specific use case. Enjoy!

Build Log - Photo Album

Click on any of the images below to view and read about each stage of the controller’s design and construction process.

View fullsize  As is tradition in online DIY forums, here's a sneak peak of the final product before breaking down how I got to this point.
View fullsize Early prototyping...
View fullsize  The first semblance of a case! This case came from an entirely different side-project, so I didn't need to assemble it or do any tweaking for use as a testing ground. Just scrap wood from around the garage.
View fullsize  At this point, I knew what I wanted to get from this controller. I designed a 3D version of my ideal controller in Sketchup and Fusion 360 before converting that to a 2D model and sending it off to a local water jet company per the recommendation of
View fullsize  Here's the controller fresh off the water jet! Done on two sheets of 1/16" thick aluminum. You can see by the two screw holes on the edge that the alignment was absolutely perfect, something I could never get as clean by hand.
View fullsize  I couldn't help myself from doing a quick test fit before getting the aluminum bent to the form of the 3D case.
View fullsize  And here it is just after being bent to shape! A simple 80* bend along the back edge and 110* bend along the front edge. Starting to look like a real controller.
View fullsize  The edges were pretty sharp at first so I sanded them down and rounded them off with this oscillating multi-tool I use all the time.
View fullsize  Spray paint! I initially looked into getting the controller powder coated but that was going to cost me anywhere from $75 to $150 and quite frankly, I didn't want to put that kind of money into it when I could get something decent with $15 worth of
View fullsize  But spray paint was good enough for me. Bronzy copper sort of finish on the sides and then a gunmetal grey on the center.
View fullsize 12 - M86LDzF.jpg
View fullsize  Then came the final stretch: wiring. Here's a wiring schematic I made for the controller using Fritzing. I ended up doing the wiring pretty much exactly as it's shown here, which is rare because I usually just diverge from the plan when it comes to
View fullsize  Mounted the new 4x20 LCD display using nylon PCB standoffs and some 3M mounting brackets. Started up wiring.
View fullsize  Not the best soldering but they survived the "tug aggressively on the wires and see if they pop off" test.
View fullsize  Here's what that clean looking wiring diagram from earlier looks like in real life. Not as pretty but good enough for me.
View fullsize  And here's the final thing! Everything on the physical side of things works as intended, so all of the big updates to it will come exclusively from the software and programming end of things.
View fullsize  And in my usual fashion, I made a USB cable for the back of it, parts supplied by my long-time buddies over at Zap Cables. If you're reading this, thanks for making it this far!

Demo Video - VO Mode

And, as promised, here is a quick demonstration (using the prototype controller from early in the build process) of the “VO” mode: designed for quickly and cleanly recording voice-over takes in a session. There are currently 8 modes set up, with room for 16 total. Here are the eight modes that are already set up:

5. Parameters

6. Automation

7. Post Production

8. VO (Voice-over)

  1. Levels/Gain Staging

  2. Tempo Mapping

  3. Instruments/Sampling

  4. FX

Source Code

If you’d like to download the code and wiring schematic for this project, feel free to check it out on the Arduino Project Hub!

Keep in mind, this is largely designed to work with my workflow, and if you need any assistance with adapting it to yours, feel free to reach out!

In DIY Tags Reaper, Controllers, Arduino
← Saturation and Loudness in Sound Design

Featured Posts

Featured
The Last Renamer
Programming
Reaper, ReaScript, Tools
The Last Renamer
Programming
Reaper, ReaScript, Tools
Programming
Reaper, ReaScript, Tools
Synchronizing REAPER Installs Across Computers
Programming, Sound Design
Reaper, Syncthing, Backups
Synchronizing REAPER Installs Across Computers
Programming, Sound Design
Reaper, Syncthing, Backups
Programming, Sound Design
Reaper, Syncthing, Backups
First Time Recording Firearms
Field Recording
Field Recording, Guns, Firearms
First Time Recording Firearms
Field Recording
Field Recording, Guns, Firearms
Field Recording
Field Recording, Guns, Firearms
UCS Renaming Tool
Programming
ReaScript, Javascript, Lua, HTML, Reaper
UCS Renaming Tool
Programming
ReaScript, Javascript, Lua, HTML, Reaper
Programming
ReaScript, Javascript, Lua, HTML, Reaper

View All Posts